Lesson 1 of 12 · Chapter 1
The Mason's Discipline
A well-laid wall begins long before the first brick is buttered. This lesson is the groundwork: a site you can work on safely for hours, a workflow that keeps mortar consistent, and the right mortar for the job.
Step one
Read the material
Five ideas. The first two are about the site and the day. The last three are about mortar: what it is, why the joint should give before the stone does, and how to choose it.
Idea one
Four zones, and a site kept honest
Think of your work area as a small factory that makes one product: accurate, durable masonry. Every extra step is fatigue, every trip over clutter is an injury waiting to happen, and every forgotten tool is a rushed decision later. Start with boundaries: a clean path from delivery to mixing to workface, agreed with the homeowner before tools come out.
Then divide the site into four zones. Receiving and staging is flat and stable, ideally upwind of mixing so dust does not blow into wet mortar, with natural stone kept on timbers or plywood out of the mud. Cutting is never "wherever there's room": a stable saw stand, a plan for the water, and a dust-controlled area. Mixing is near a hose, with bags on a pallet and covered. The workface is clean and intentional, with levels and line blocks kept off the dirt.
Silica dust is not a nuisance; it is a long-term injury you cannot undo. Wear a properly fitted respirator rated for silica, not a loose paper mask, plus eye and hearing protection. Every trip hazard is dealt with immediately: cords taped along an edge, offcuts into a bin. Later is where ankles go. End each day the way you want to begin the next: materials covered, tools cleaned before mortar sets like rock on steel, and a short note of where you got to.
Idea two
Work in batches, not all at once
The most common beginner mistake is to do everything at once: a little layout, a little cutting, a little mixing, a little laying. That creates stop-and-start mortar, and stop-and-start mortar means inconsistent joints and weak bonds. A disciplined day groups the work into batches.
Begin with layout and dry planning. Measure, square, mark, and dry-lay a short run if you are unsure. Beauty in masonry is planned in the first hour, when you decide where full units land and where a cut can hide. Then stage only what you can place in the next 30 to 60 minutes. With stone, stand a selection on edge and audition them; that patience comes back as speed at the wall.
Mix mortar in batches you can place within their workable life. Once mortar starts to set, adding water does not restore it; it weakens it. That is retempering, and it is a hidden failure because the joint still looks fine. Discipline is not about working slower. It is about removing the pressures that make you work sloppy. Stage your protective gear like tools, with glasses on your head, not in your pocket, and do not twist under load.
Idea three
What mortar is, and the three jobs it does
Mortar is not glue. It is a controlled reaction between binder, sand and water. It does three jobs at once: it levels and beds, so load transfers evenly instead of sitting on high spots; it bonds, keying into pores and locking sand grains into a stone-like matrix; and it manages movement, as the sacrificial layer that takes small movements so the units do not have to crack.
Portland cement gives early strength. Lime makes the mix workable and forgiving, holds water in so porous units do not starve it, and slowly carbonates back toward stone. Sand is the skeleton, and because sand varies from pit to pit, a dedicated measuring bucket is what makes the mix repeatable. Water triggers the reaction, but extra water leaves pores behind: a joint that looks full but cures porous becomes a water highway, and in freeze-thaw that is where spalling begins.
Cleanliness is chemistry. Dust on a unit face is a bond breaker. Time is chemistry too: tool too early and you smear and weaken the surface, tool too late and you tear it and leave microcracks that invite water.
Idea four
The joint should be weaker than the unit
Mortar types are shorthand for strength and, indirectly, for how stiff and accommodating the mortar will be. Type N is the general-purpose mortar for above-grade walls. Type S is stronger, for below grade, retaining walls and severe exposure. Type M is stronger still, for high compressive loads, and rarely a homeowner's first choice. Type O is softer, for interior and historic restoration work.
Strength is only half the story. The other half is compatibility. The joint should generally be weaker than the brick or stone, so the wall relieves stress over decades by minor mortar cracking or joint erosion, which you can repoint, not by cracking the unit, which you cannot easily replace. In old brickwork, a hard modern mortar can turn a repairable joint into a cracked brick face.
People reach for "strongest" as if it were safest. Often it is the opposite. A stiff mortar transmits movement, and on soft units the wall fails the quiet way, a season later, with a stair-step crack. A too-strong mortar is also less workable, which leaves voids, and voids are weakness regardless of the rating on the bag.
Idea five
Choosing the mortar for the job
Before you buy a bag, ask four questions. Is the work above grade or below it? What must the mortar resist: vertical load only, or lateral pressure from soil, wind or impact? What are the units like: hard modern brick, soft historic brick, crisp veneer, irregular fieldstone? And how forgiving does the assembly need to be?
Then the book's guide. An above-grade wall that retains nothing: Type N is usually the starting point. A retaining wall, backfilled wall or masonry in contact with soil: Type S, but the mortar does not carry the job alone. Trap water behind it and you have built a stronger-looking failure, so drainage is part of the wall. Repointing old, soft brick: do not default to Type S; match the existing mortar, err on the softer side, and verify, or have the mortar analysed. An interior thin-brick wall: Type N or a manufacturer-approved veneer mortar. Anything exposed to high heat, such as the inside of a firebox: refractory mortar. A strong mortar is not a heat-rated mortar.
Low-carbon and biochar blends are engineered products, not folk recipes. Follow the data sheet, confirm the uses it is approved for, and lay a test panel of ten to twenty units before you commit a whole wall. If you cannot promise yourself measured water and small batches, buy preblended mortar. Consistency does more for durability than chasing an extra letter on the bag.
The whole of chapter 1 is free to read or hear on the Stonemason's Discipline reader page.
Step two
Work it with your hands on it
The Mortar Selector. Choose the job, the units and the bag, and the bench answers the way chapter 1 does, with the reason and the warning that goes with it. Then change how the mortar is mixed and watch what happens to the joints. Try old, soft brick on a retaining wall and see why the book says not to guess.
The job
The units
The bag
How it is mixed
Hands on it, off the screen. Walk the place where you will build your next project and sketch the four zones on paper: staging, cutting, mixing and workface, with the path between them and the direction the wind usually blows.
Then answer the four questions for that project in writing: above or below grade, what it must resist, what the units are, and how forgiving it must be. The answers are your mortar choice, before you are standing in the store.
Step three
Prove you understood it
One question per idea, a new situation every time. Miss one and you are sent back to the idea it was testing.
All five solid.
You can lay out a safe site, run a day in batches, say what mortar does and why the joint should give first, and choose the mortar for the job. Chapter two goes underground, to the soil and drainage every wall stands on.
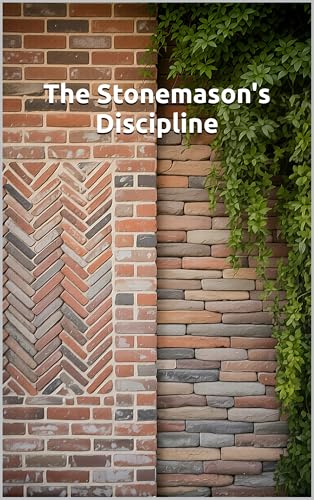
The Stonemason's Discipline
Lesson one of twelve, from chapter one. Written by our founder, Dr. Gene A Constant, and donated to the Foundation. Published by Global Sovereign University Press.
Buy a copy - it funds a free seatGSU is a 501(c)(3) nonprofit and book sales are its only income. A purchase is not a tax-deductible donation. As an Amazon Associate, GSU earns from qualifying purchases. This lesson is free and always will be.