Lesson 3 of 12 · Chapter 3
Brick Bonds and Patterns
With the ground right, brickwork becomes visible craft. This lesson is the red line: how bricks overlap so a wall acts as one body, the classic bonds and paving patterns, and how to choose the one the job can live with.
Step one
Read the material
Five ideas. The first three are about walls: what bond is, the classic bonds, and the module that holds them. The fourth is paving patterns. The fifth is how to choose.
Idea one
Bond is structure, not just looks
When masons say bond, they mean how units overlap so the wall behaves as a single body, not a stack of aligned joints waiting to split. Pattern is the look, but in real work pattern and structure are married: the bond affects load paths, crack resistance, and what your mistakes look like. A running bond hides small variations; a more intricate bond exposes them.
A standard brick shows a stretcher face, the long side, or a header face, the short end. Old structural brickwork used headers to tie the wythes together, so the wall's thickness acted as one mass. Modern veneer uses metal ties to the framing instead, which is why some historic bonds are now chosen for character. The logic still matters: even in a single-wythe veneer, a bond that breaks up vertical joints makes a crack less likely to run straight up like a perforation.
Do not let the ends decide your pattern. Lay a dry course or chalk out a run first, and decide how corners, openings and returns will be handled so the cuts look intentional.
Idea two
The classic wall bonds
Running bond offsets each course by half a brick: fast, forgiving, and structurally sufficient in veneer when tied correctly. Stack bond sets every brick directly above the one below. It is calm and precise, but it does not interlock across joints, so freestanding or load-bearing it is weaker; outside it needs reinforcement and strong lateral support, and every wandering line shows. It suits small, controlled areas like an interior statement wall.
English bond alternates whole courses of stretchers and headers, a rhythm like marching, with old-world authority. Flemish bond alternates header and stretcher within every course, with each header centred over the stretcher below. It feels woven, and it punishes improvisation: corners are planned with queen closers, half-width bricks beside the corner header, so no vertical joint runs up the edge. Common or American bond lays several stretcher courses and then a header course, a quiet belt line on a long wall. If you use header-look units in a veneer, execute them honestly.
Corners are where a wall looks professional or homemade. Corners are not where you end the pattern. Corners are where you declare control.
Idea three
The module: brick plus joint
Brick is built around a module: the unit length plus the joint. Treat the joint as an afterthought and the pattern drifts, and drift accumulates until the last course forces a thin, weak joint or a sliver cut that looks like desperation. The bond is a grid, and the mortar joint is part of the brick's size.
So set corner leads or story poles, pull a line, and lay a short test section, not to admire it, but to verify that your brick and your joint give the module you think they do. If an adjustment is needed, make it a controlled one, a slightly thicker joint spread over several courses, not a single ugly correction at the end.
Patterns make consistency visible. If your water measurement wanders, pigmented mortar shows it as bands; if you retemper, one section tools crisp and the next smears. And stop while you are still in control. Pattern work tempts you to finish the section when you are tired and the tub is changing. Clean up, note your stopping point, and come back with the same rhythm.
Idea four
Herringbone and basketweave on the ground
Herringbone locks together: the interlaced V resists creep under foot traffic and even light vehicle loads. It also betrays an out-of-square base, pinching at one end and opening at the other. At 45 degrees it is the most dynamic and disguises wear; at 90 degrees it relates to the borders and reads more modern. Start from two square control lines placed so the edge cuts balance, lay a small pattern seed, and work off the laid brick. If the V's begin to skew, stop and correct at once; herringbone drift compounds fast. Edge cuts are part of the pattern, so batch them and dry-fit them.
Basketweave is quieter but not easier. Pairs of bricks alternate direction like woven strips, and the rectangles must stay consistent. Inconsistent joints and pairs not checked for square make it stair-step after a few feet; check with a square every few repeats and fix a skewed pair immediately. It exposes size variation, so sort reclaimed or handmade brick in the staging zone first. And without a strong edge restraint, even a perfect pattern will creep.
No pattern solves what the base failed to solve. Chapter 2's compaction and drainage are what let these patterns stay honest.
Idea five
Choosing the pattern for the job
A mason chooses a pattern the way they choose mortar: by what the assembly must endure. Under turning traffic, wheelbarrows, grills, furniture, interlock matters and herringbone earns its reputation; running bond can be stable but leans on edge restraint, and basketweave becomes more about craft than strength. On a wall tied to a structure that may move, pick a forgiving bond that will not turn one small crack into a headline.
Then ask how square your world is. On an irregular footprint, herringbone's edge cuts become a design element, and a border, a soldier course or a straight band, absorbs the irregularity and strengthens the edge. Basketweave wants rectangles. Flemish bond is a joy on a simple run and hard work around many openings. Consider viewing distance, too: herringbone is energetic, basketweave calm, Flemish refined only if the joints are clean.
Be honest about the joint you can tool and the brick you have: running and common bond absorb size variation; basketweave does not. Busy patterns hide minor wear, but no pattern hides a puddle. The mason's triage: pick for performance, then for geometry, then for legacy. A good pattern is not the fanciest one. It is the one you can lay with steady hands.
The whole of chapter 3 is free to read or hear on the Stonemason's Discipline reader page.
Step two
Work it with your hands on it
The Pattern Bench. Choose the job, the footprint or the site, and the brick, then try each pattern. The bench draws it and rates it the way chapter 3 would, with the reason and the conditions attached. See which pattern survives turning traffic, and what happens to stack and Flemish on a site that may move.
The job
The footprint
The site
The brick
The pattern
Hands on it, off the screen. Lay ten bricks dry on a flat spot in running bond with a pencil or spacer standing in for the joint. Measure across the run and divide by ten. That is your real module, brick plus joint.
Then walk to where you would stand to see your project, at the door or the gate, and decide what you want the surface to do from there: feel wider, feel longer, or feel settled. That is your pattern choice, after performance and geometry.
Step three
Prove you understood it
One question per idea, a new situation every time. Miss one and you are sent back to the idea it was testing.
All five solid.
You can say what bond does, name the classic bonds on sight, hold a module, lay herringbone and basketweave without drift, and choose the pattern the job can live with. Chapter four is the joint itself: tooling, profiles and curing.
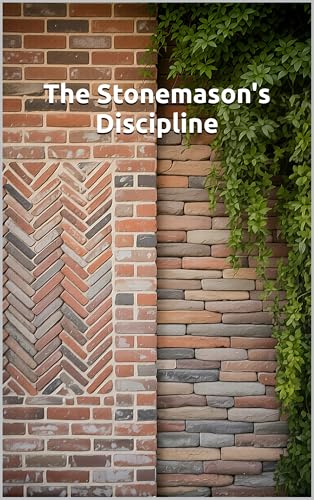
The Stonemason's Discipline
Lesson three of twelve, from chapter three. Written by our founder, Dr. Gene A Constant, and donated to the Foundation. Published by Global Sovereign University Press.
Buy a copy - it funds a free seatGSU is a 501(c)(3) nonprofit and book sales are its only income. A purchase is not a tax-deductible donation. As an Amazon Associate, GSU earns from qualifying purchases. This lesson is free and always will be.