Lesson 4 of 12 · Chapter 4
The Perfect Mortar Joint
The public thinks the brick is the work. The weather knows the joint is the work. This lesson is how fresh mortar becomes a dense, water-shedding skin: timing, tooling, the profile you leave, and protecting it through heat and frost.
Step one
Read the material
Five ideas. The first three are the craft of striking and tooling. The fourth is the profile. The fifth is the weather the joint has to survive.
Idea one
The joint is the work
The mortar joint is not a gap you fill. It is a designed surface: the seal, the cushion and the frame. It must shed water, resist freeze-thaw, tolerate small movement, and make the bond look deliberate. A well-struck joint is why a wall reads crisp from twenty feet away; a poorly tooled one is why a wall looks tired in one season.
The work starts as you lay. Bed each unit fully and keep head joints filled. Mortar squeezed to the edges is not waste; it is proof of contact, and it gives you something to strike later. Voids are water pockets and bond breakers, and no jointer can honestly fix a gap behind the face.
Cut the excess with a clean, angled pass of the trowel, almost like shaving, and put it back on the board. Smears left to dry on the face become a cleaning job that risks staining. Keep a bucket and sponge for your hands and tools, not for washing faces; water used carelessly is a stain delivery system. Done right, the joint stays the sacrificial part: one day it gets repointed, and the brick never needs replacing.
Idea two
Thumbprint hard: the tooling window
Mortar moves through stages: plastic, then firming, then thumbprint hard, then tough and grainy. Press a thumb into a discreet joint. If mortar smears onto your thumb, it is too early. If it resists but takes a clean print, tool now. If it feels sandy, cracks or chips, you are late.
Early tooling pulls cement paste to the surface: a smooth, glazed skin over weaker mortar that crazes into hairline cracks. Late tooling tears the edges away from the brick, and those tiny separations are a path for water. When you are late, pushing harder only tears more. The answer is prevention: lay in manageable runs so the window stays predictable, watch the sun and wind, and never mix more than you can place and finish.
Do not wet-tool by dipping the jointer in water to make it glide. It brings laitance, a weak cement-rich film, to the face, and can shift the colour. If the joint needs water to tool, you are early, the mortar is too dry, or the jointer is dirty. Solve the cause.
Idea three
Tooling is compaction
Tooling is not decoration. A jointer pulled with steady, firm pressure at the right time compresses the mortar surface, closes pores, and makes a dense skin that sheds water. Match the jointer to the joint width: too small digs tracks, too large skates on the brick edges.
Tool the bed joints first, then the head joints, so the heads cut cleanly into the bed line and intersections stay crisp. Scrape the jointer clean every few passes; dried crumbs drag grit and leave a rough surface that holds water and dirt. At corners, make one clean pass that meets the adjacent joint decisively. Overworking polishes the mortar and can crack it. Mortar needs to cure in peace.
Brush last, and time it: too early smears, too late only scratches. Use light, consistent strokes, usually diagonal across the joints, to remove burrs, not to erode the face. In a patterned bond, every joint frames a header, so a batch that tools creamy and the next that tools dry will show as bands across the wall.
Idea four
Concave, V and grapevine
Joint profiles are small roofs and gutters repeated thousands of times. Concave is the workhorse: a rounded jointer compresses the face and leaves a curve that sheds water, and it forgives slight size variation and rough edges. For wet, freezing exterior work, it is the default. It adds softness, which may fight a razor-sharp modern grid.
The V-joint leaves a sharp groove: crisp, formal, and lovely framing Flemish headers. It can shed water well, but it is less forgiving: early and it slumps, late and it tears, and any torn edge becomes a water path. It makes straight courses look straighter and wandering ones more visible. The grapevine is compacted like a concave joint with a line pressed down the centre, a heritage signature. It demands consistent batches and rhythm, and the crease will collect dirt and patina.
Choose by exposure, then by the units, then by what you want the wall to say. And choose the profile you can repeat without panic. The weather will not grade you on ambition. It grades compression, density, and whether you invited water to linger.
Idea five
Freeze-thaw, curing and the cap
Freeze-thaw is not bad luck. Water gets in, freezes, expands, and pries at whatever pores, voids and microcracks you gave it. The unit is rarely the first mistake. The first mistake is giving water a comfortable place to sit, in the soil or in the joint. Durability is not waterproofing; it is managing wetting and drying.
Before laying, control suction: on hot, dry or windy days, lightly dampen thirsty units so they do not starve the mortar. Keep units clean, because a poor bond line is a water seam. Do not overwater the mix, which adds shrinkage and porosity. After tooling, protect curing. Mortar cures by hydration, and lime mortar also by carbonation, not by drying: shade or mist it in heat, and do not lay into a freezing night without protection, because mortar that freezes before it gains strength has its bond disrupted while it forms.
Cap the wall. Many failures begin at an open top course, where water saturates the core and freezes from the inside out. A capstone or coping with overhang and drip is the wall's roof. Give sills and ledges slope and a drip. And treat efflorescence as a message that water is moving: find the source before you scrub.
The whole of chapter 4 is free to read or hear on the Stonemason's Discipline reader page.
Step two
Work it with your hands on it
The Joint Bench. Set when you tool, which profile you leave, whether the joints are full, whether the wall is capped, and how it cures. The bench draws the joint in section and tells you what the first winter will do to it, worst problem first. Nothing survives until every choice follows chapter 4.
Exposure
When you tool
The profile
The joints
The top of the wall
Curing
Hands on it, off the screen. Mix a small batch of mortar and lay three bricks on a board. Every five minutes, press your thumb into a joint and note what you feel: smear, clean print, or sandy. Write down how many minutes it took to reach thumbprint hard, and the temperature and wind that day.
Then walk a brick wall near you and look at the top course and every ledge. Where does water sit? Where is the wall darker, or white with salt? Those are the places the joint and the cap are losing.
Step three
Prove you understood it
One question per idea, a new situation every time. Miss one and you are sent back to the idea it was testing.
All five solid.
You can fill and cut a joint cleanly, find the thumbprint-hard window, tool for compaction, choose concave, V or grapevine for the wall and the weather, and protect the work while it cures. Chapter five builds the openings: arches, lintels and headers.
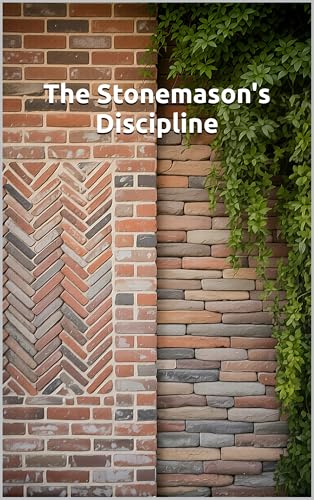
The Stonemason's Discipline
Lesson four of twelve, from chapter four. Written by our founder, Dr. Gene A Constant, and donated to the Foundation. Published by Global Sovereign University Press.
Buy a copy - it funds a free seatGSU is a 501(c)(3) nonprofit and book sales are its only income. A purchase is not a tax-deductible donation. As an Amazon Associate, GSU earns from qualifying purchases. This lesson is free and always will be.